meta data for this page
General
User interface
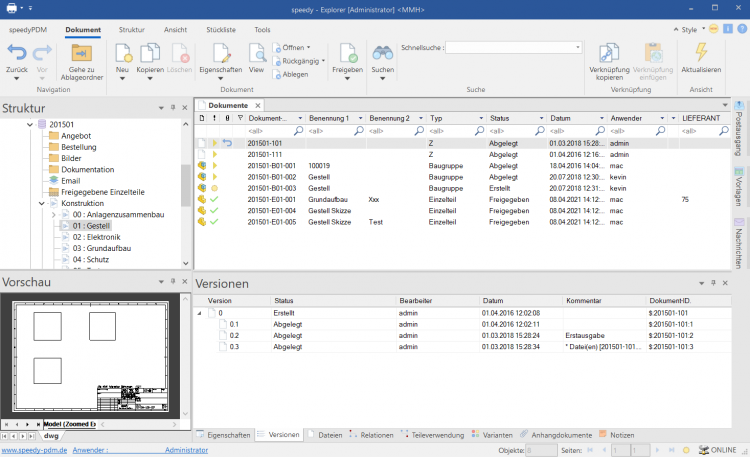
The user interface of speedy is divided into the following areas
- Title bar
- Ribbon
- Address bar (breadcrumb navigation)
- Navigation/structure (tree control)
- Document list
- Document properties
- and preview
- Status bar
The title bar corresponds to the Windows standard. Here you can close speedy with a mouse click, change the size of the window or hide it completely. The programme name and the user currently logged in are also displayed.
The speedy commands can be called up in the ribbon bar. The ribbon bar is divided into tabs by topic.
The defined vaults and subfolders are displayed in the Structure window, as well as a collection folder for search results.
By clicking on an entry in the structure, the document list is filled with the corresponding documents. If you select a document by clicking on it, the general document properties and a file preview are displayed in the properties window.
Explanation of characters and terms
| Start » Programmes | Open the start menu, open the programme group |
| System » Exit | Open the System menu, click on the Exit command |
| [Enter] or [Enter] | Press the Enter key on the keyboard |
| File » New, {[Ctrl]+[N]} | Alternative commands |
| Other text | Important additional information |
| Project name | Texts in dialogue windows, names of buttons and argument names for functions |
“Mouse click” or “Click” etc. always refers to clicking with the left mouse button. Clicking with the right or centre mouse button is explicitly mentioned in each case.
Command interaction
Right mouse button and context menu
In speedy, all frequently used commands can be selected via the context menu of the right mouse button. Context menu means that the menu is dependent on the object selected with the right mouse button. Depending on which object is clicked with the right mouse button, a menu with commands belonging to this object appears.
The left mouse button
Commands can also be called up via the menu bar and the toolbar. In both variants, the command is selected with the left mouse button.
Keyboard shortcuts
Important commands can also be called up using the keyboard. The following keyboard shortcuts are defined in speedy:
| [Ctrl]+[A] | Select all |
| [Ctrl]+[C] | Copy |
| [Ctrl]+[D] | Add to favourites |
| [Ctrl]+[E] | Document/container properties |
| [Ctrl]+[F] | Search document |
| [Ctrl]+[G] | Go to folder |
| [Ctrl]+[I] | Import document |
| [Ctrl]+[K] | Copy document |
| [Ctrl]+[N] | New document |
| [Ctrl]+[O] | Open/check-out document |
| [Ctrl]+[Q] | Show document |
| [Ctrl]+[R] | Release document |
| [Ctrl]+[S] | Check-in/stamp document |
| [Ctrl]+[T] | New tab |
| [Ctrl]+[U] | Undo check out/release document. |
| [Ctrl]+[V] | Paste |
| [Ctrl]+[W] | Close current tab. |
| [Ctrl]+[X] | Cut |
| [Ctrl]+[Z] | Undo |
| [Ctrl]+[Shift]+[W] | Close all tabs. |
| [F1] | Online help |
| [F4] | Expand selection list. |
| [F5] | Refresh display. |
| [F6] | Switch selection list filter. |
| [Shift]+[C] | Collapse tree structure |
| [Shift]+[E] | Expand tree structure |
Login
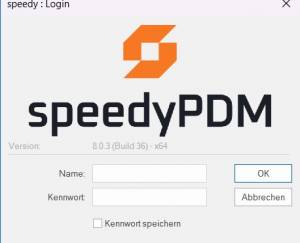
When starting speedy for the first time, the user must log in to the system and enter the password specified by the administrator.
If you have activated the Save password checkbox, the password is saved with your Windows user profile so that it does not have to be re-entered each time the programme is started. The login window is no longer displayed the next time you call up the system and the programme is started automatically.
Change password
Ribbon view “ Change password
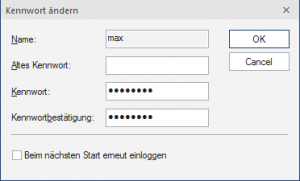
After calling up the command, a dialogue box appears for entering the old and new passwords:
Only alphanumeric characters (letters, numbers) are permitted, no special characters. The minimum length must correspond to the length defined under [session.password.length].
User change
Ribbon view ” User change
This functionality is particularly interesting for administrators who use several user IDs with different authorisations for test purposes. As the speedy user under which the current Windows user was last logged in is always automatically logged in due to the saved login, it is only possible to change users within speedy using this login.
Please note that user-specific settings such as project visibility are not updated, only the authorisation check changes.
User options
Ribbon: speedyPDM > User options
Ribbon: View > Options
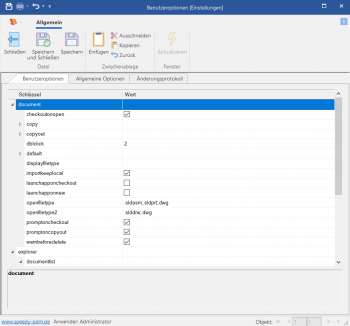
Opens the dialogue for editing the user options.
Settings can be labelled as user-specific by the administrator. These can be changed in the user options.
Dialogue with messages
In the extended dialogue for messages, references to documents appear as blue text with the document number in square brackets (e.g. [202301-B00-001]).
A simple click on the document number opens the properties of the document in read-only mode.
Holding down the [Shift] key opens the document properties for editing.
Holding down the [Ctrl] key closes the message if it is a general error message and the document is displayed in the search results.
Reset messages/errors/warnings
Ribbon: speedyPDM > Messages
Some warnings, error messages and user queries can be deactivated by selecting the option “Do not ask this question again” or “Do not report this message again” in the message dialogue. These deactivated messages can be reactivated using this command. A dialogue with all deactivated messages appears. Select all messages that are to be reactivated, i.e. that are to appear again the next time they occur, and confirm the dialogue with OK.
Refresh view
Ribbon View “ Refresh {[F5]}
When refreshing the view of speedy, the individual windows are reorganised. The current vault database is reloaded and changes to documents made by other editors are displayed.
Exiting speedyPDM
Ribbon speedyPDM ” Exit {[Alt]-[F4]}
If the Explorer is the last speedy application to be closed on the workstation, the system checks whether documents still have the status in progress and reports this with the option to check-in this document. (see also [document.workspace.autocheckin])


